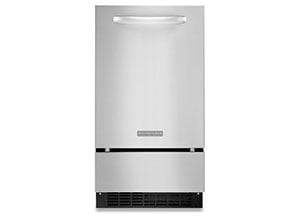
KitchenAid and Whirlpool under-counter icemakers are an expensive investment.
Many repair companies shy away from having to deal with them but honestly, they are a fairly simple appliance.
Download the service manual .pdf found at the bottom of this page so you fully understand the production cycles of the unit.
To Enter the Service Mode:
Remove the reservoir drain cap and make sure the reservoir is empty.
Remove the ice cutter plastic cover (just under the control buttons) to make it easier to see inside. Two 1/4″ screws on the underside of the cover.
Unplug the unit and wait for 5 minutes.
Plug in the unit and press the “On/Off’ button.
- Immediately press the “On/Off” button and the “Clean/Reset” button at the same time and hold them until all button l.e.d.’s light up.
Release and press the “Service” button.
- The “On/Off” button blue l.e.d. should now remain solid if the bin thermistor is good.
- If the bin thermistor is bad it will blink 2 times and then pause or sometimes 4 times and then pause and repeat.
Next press the “Service” button again.
- If the “Clean/Reset” button green l.e.d. remains solid, the evaporator thermistor is good.
- If the evap thermistor is bad it will blink 2 times and then pause or sometimes 4 times and then pause and repeat.
- (note: sometimes evap thermistors become corroded at their connection to the evaporator coils. Check and clean making sure the thermistor is making good contact before running diagnostics and testing again.)
Next press the “Service” button again.
- This test the water valve and water level sensor.
- The green “Clean/Reset” l.e.d. stays solid while the red “Service” l.e.d. blinks as the water valve opens and fills the reservoir. When the level sensor senses the water level the red “Service” l.e.d. becomes solid.
Next press the “Service” button again.
- The blue “On/Off” l.e.d., the red “Service” l.e.d. and the green “Clean/Reset” l.e.d. should now be lit solid.
- The re-circulation pump (black pump inside the reservoir) should now come on and begin moving water out of the reservoir and over the frost plate.
Next press the “Service” button again.
- The blue “On/Off” l.e.d. should be on and solid.
- The reservoir drain pump (black pump underneath the reservoir) should now come on and pump the water out of the reservoir. Its normal use is during the cleaning cycle to rinse the drain pump of cleaning solution.
Next press the “Service” button again.
- The blue “On/Off” l.e.d. and the green “Clean/Reset” l.e.d. will be solid.
- This test starts the compressor and the condenser fan.
- When the evaporator thermistor gets cold enough the red “Service” will blink. This usually takes between 8 and 10 minutes to start blinking.
Next press the “Service” button again.
- The “On/Off”, “Service” and “Clean” l.e.d.’s will be solid.
- This test the compressor and hot gas solenoid valve.
- When the evaporator thermistor gets warm enough the red “Service” l.e.d. will blink.
Depending on what main controller board you have installed you may be able to press the service button a couple of more times for the “Max Ice” function and the “Ice Size” function. You can refer to the video below for more information.
When you are finished with Diagnostics press and hold the “On/Off” button for 3 seconds.
Here are some more resources for your troubleshooting adventure.
Undercounter Ice Maker Service Manual
www.truetex.com Repairing the Whirlpool and KitchenAid Ice Machines
www.truetex.com Replacing the Evaporator on Whirlpool or KitchenAid Stand Alone Ice Machines
(This page is for educational use only. You can be electrocuted if you touch certain internal components. This page is intended for reference by qualified repair technicians only.)


